Saturday 24 August 2013

Recipe: Mini Pavlova / Meringue Nests


Australians love pavlova. This is a super easy recipe from taste.com.au. It’s not overly sweet and it has a chewy texture. Instead of the full sized pavlova, I prefer to make and bring these to parties, as it saves having to cut and serve them into individual servings.

The mini pavlova base or meringue nests have only two ingredients:
·         2 egg whites
·         1/2 cup caster sugar


When I take them to parties, I always bring them naked and bring the toppings in separate containers or in a chip & dip platter. This way it is easier to transport, and it also means people can choose which toppings they like.

Toppings I tend to bring include:
·         Chopped up fruit, like strawberries, kiwi fruit or mangoes
·         Crushed Maltersers, crumbled Flake or shaved Cadbury’s Dairy Milk

I’ve had cravings for chocolate covered strawberries lately so today, I topped my mini pav with cream, strawberries and drizzled melted chocolate on top... YUM!!


Monday 12 August 2013

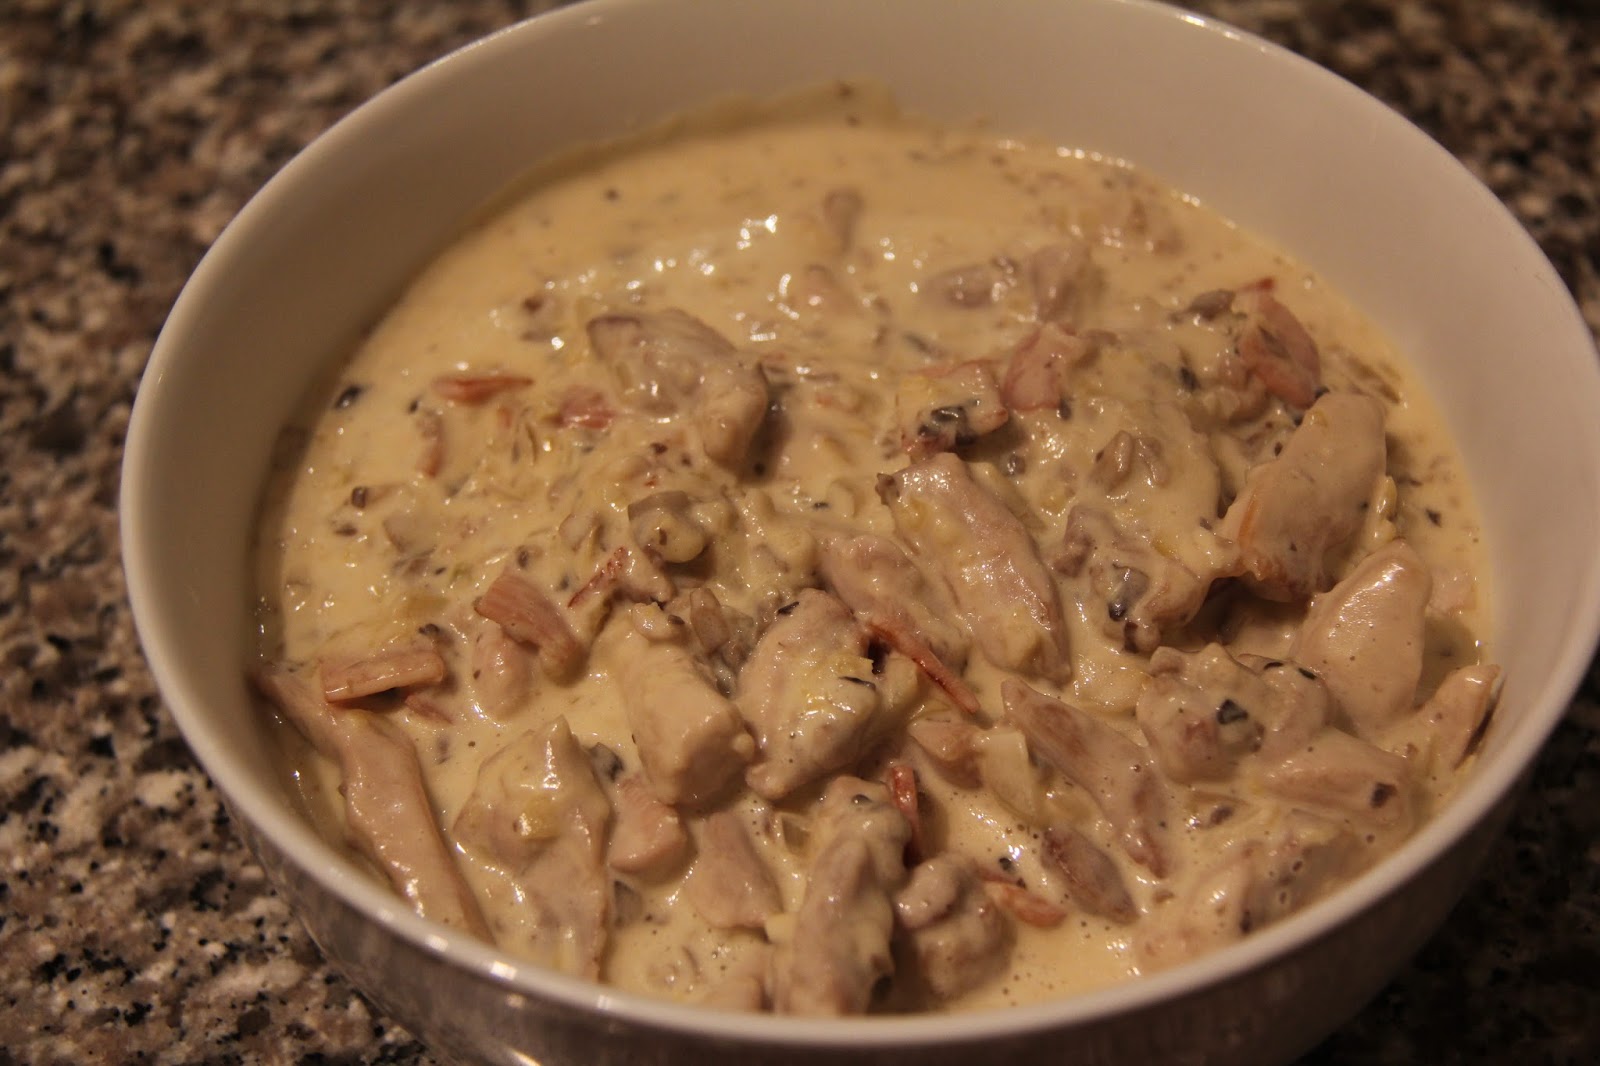
Recipe – Artichoke Chicken Pasta


This is inspired from a recipe I found at allrecipes. Instead of baking the chicken, I’ve turned it into a sauce we serve with pasta. The whole family loves this dish including picky children. Because the artichoke is finely chopped, the kids do not notice it in the dish. The pasta is creamy and slightly tart from the artichoke.


This is best eaten immediately and does not reheat well as it tends to separate and becomes oily.

Ingredients:
·         2 rashers bacon, chopped
·         1/2 onion, finely chopped
·         3 cloves garlic, finely chopped
·         5 mushroom, finely chopped
·         1/2 cup mayonnaise
·         1/2 cup sour cream
·         3/4 cup grated Parmesan cheese
·         150gm marinated artichoke hearts, drained and finely chopped
·         Oil
·         4 skinless, chicken thigh fillets, sliced
·         Fettuccine pasta, cooked

Directions: 


Sautee the bacon in a dry frying pan.
Add onion and garlic and continue to fry until onion is translucent. You can add some oil if the pan is too dry
Add mushroom and cook for a minute


Transfer the bacon and mushroom mixture to a plate and allow to slightly cool.


Mix mayonnaise, sour cream, parmesan cheese and artichoke in a bowl


Lightly fry the chicken in oil until cooked.


Add the bacon and mushroom mixture to the mayonnaise and sour cream.


Add the creamy mixture to the chicken, bring to heat and simmer for 5 minutes.


I don’t normally mix the sauce with the pasta before serving as the cream gets absorbed by the pasta and it ends up looking like there’s no sauce at all.  


Thursday 8 August 2013

Refashion Tutorial – Men’s shirt to women’s peplum shirt


Look around the DIY section of Pinterest, and you’ll soon find different projects you can make from men’s shirts. They range from no-sew dresses to skirts and even kids’ pants.

I found this refashion tutorial from Cotton+Curls that I just had to try. It’s a little more challenging than many of the refashions out there but was too cute to pass up.

It just so happened that my husband had a brand new size XL business shirt that he was going to donate to St Vinnies because it was too large for him. It was the perfect item to try out this refashion, because even if I completely stuff up, it would not have cost me a cent!

Here is the before & after photo:


And here's my very first refashion tutorial!


Try on the shirt and place a pin on the shirt where your waist sits.

Cut about an inch below where you pinned. The bottom half will become you peplum.

Make sure that where you cut is in between two buttons. I cut mine right above a button hole which meant that I had to create a new button hole right where the seam is on the finished shirt (NOT worth the effort!)


Cut the sleeves from the shirt.


Try on the top inside out and pin the sides where it needs to be taken in. On the shoulders, mark with pins where you want the new shoulder seams to sit.


Trim the arm openings, leaving a seam allowance.


Sew the new side seams. If you want you can also add darts for a better fit. This is the top without darts. I later put two darts at the front and two at the back.


Unbutton the top half and measure the width. Now unbutton the bottom half and gather to the same width as the top. They need to be the same as they will be sewed together. I used a straight stitch on my sewing machine, but this can be done by hand.

NB: I made the mistake of gathering the bottom half while it was buttoned up (ie like a skirt). Once pinned to the top I couldn't open it up due to the stitching from the machine. So make sure you gather it while it is unbuttoned!


Pin and sew the two halves together. Make sure that all the original seams (sides, middle button parts) line up perfectly.

Once attached, this is what it should look like flat, and tried on.


Next, try on the sleeves and pin where it will be trimmed. I made my sleeve sit above the elbow and I also turned it around so that the section with the button sits outside (unlike in men’s shirts where it sits inside the arm).


Trim the sleeves. If you are not familiar with pattern cutting (like me), use the other sleeve as a template.

I had to trim and try on a few times to get the perfect length.


To attach the sleeves, turn the shirt inside out but keep the sleeves the right side out (so that the right sides are together). Insert the sleeve into the shirt and line up the sleeve into the arm hole, as per the picture.


You can overlock/serge/zigzag all the raw edges to prevent fraying.

This is what the finished shirt looks like tried on.